Place & Lighting
It is essential to have a few hours of direct sunshine; overwatering-related problems may arise from shaded areas. The frequency of irrigations depends only on solar radiation received. Too little light is usually the cause if the aloe starts to produce a discolored white crown. Freshly propagated “pups” should not be exposed to sunlight since their little root systems will not be able to retain enough moisture to withstand the intense light.
Water:
Water the soil well every ten to fourteen days throughout the growth season, letting it dry out in between. To ensure optimal health, winterize any aloe; limit watering frequency to once every three weeks to keep the plant “ticking over” and prevent overfertilization. One piece of advise is to keep excess moisture out of the plant’s real crown and out of the container itself, since these may lead to root rot or southern blight. Drooping leaves, stunted growth, and drying leaves are signs of underwatering; they may be caused by a variety of problems, such as forgetting, receiving too much sunshine, or the plant being pot-bound. Symptoms of overwatering include a decaying base, rapid plant death, and yellowing lower leaves. In order to prevent root rot, aloes need enough light—at least two hours of direct sunshine every day. Click the following link to find out how to treat root rot in more severe situations.
Humidity: This doesn’t matter, although if the aloe is inside, giving it a periodic hose-down will help to minimize the amount of dust that accumulates on its leaves. Avoid saturating foliage at night because powdery mildew is more likely to occur.
Fertilization:
During the spring and summer, add a supplement every six weeks using a feed labeled ‘Houseplant’ or ‘Cactus & Succulent’. In the fall and winter, cut this down to once every 10 weeks to mimic its dormant season. Fertilizers marked as “ready to pour” should not be applied to dry soil as they might scorch the roots. Instead, wet the compost a few minutes in before.
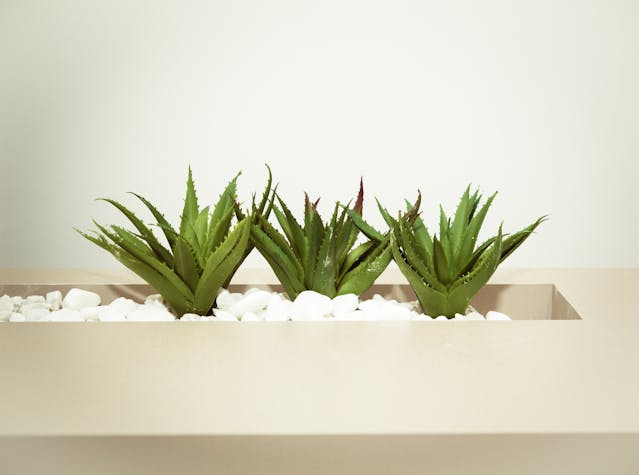
The standard size that garden centers will carry, for around £15.
Typical Problems with Aloe Vera
The worst problem with Aloe veras is overwatering; common symptoms include dark leaves with mushy areas on the undersides of the leaves, basal/crown rot, or the growth of mold on the soil. You will need to consider which sections of the plant to keep dry in addition to being aware of the possibility of root rot. To replicate the conditions of the south Arabian deserts, the soil has to experience dry spells and have less root rot. In order to stop basal rot from developing, the center crown of the plant must also always be dry. Please visit this link to learn more about concerns associated to overwatering.

An area with a pale center crown usually has little light. Because these plants are native to dry regions, try to mimic their environments by providing two hours or more of direct sunshine each day, particularly in the dead of winter.
Too little water and too much sun exposure cause reddened leaves with crispy brown margins. All aloes make excellent plants in sunny areas, but those that haven’t adjusted to the intense light will exhibit symptoms of environmental shock and sun burn. Extended exposure may hasten the drying process considerably, so think about repotting it (in the spring) into a larger pot so the roots can be wrapped around more moisture-retaining soil. If after two months your Aloe still doesn’t seem to be getting better, move it to a slightly shaded spot.
On the other hand, overexposure to sunlight may cause sunscorch, which is characterized by browning or crispy leaves, dry leaf margins, sunken leaves, stunted development, and “pup” mortality. Too much sunshine can also harm the plant, even while too little light may lead to overwatering problems. An area with more than two hours of sunshine every day will provide the best growing conditions for aloe vera. If this problem has not been resolved in yours, cut down on the quantity of sun exposure significantly and be aware of environmental shock at all times (when two sites provide too diverse growth circumstances). Eliminate a portion of the impacted foliage and somewhat boost watering.
If an aloe is oversupplied, it will only cause problems, such as fading leaves and sluggish, uneven development. Frequent feeds are a great approach to encourage robust, healthy development, but roots can burn fast due to dry soil and fine chemicals in the feeds. The best course of action in this situation is to pre-moisten the soil; this will eliminate the chemical edge included in fertilizers as well as the possibility of root burns.
Sources
This plant has gone under many names in the 18th and 19th centuries since Carl Linnaeus formally classified it as Aloe perfoliata in 1753. These names include A. lava, A. lanzae, and A. vulgaris. Although the plant is native to the Arabian Peninsula, it has recently become naturalized in Africa. Nicolaas Burman gave the plant its popular name, Aloe vera, in 1768. The Latin word vera means “true.” The species’ medicinal properties were mentioned in Dioscorides’ De Materia Medica, written in the first century AD.
The temperature
46° to 78°F, or 8° to 25°C
Hardiness Zone 11 (H1c): This zone allows for outdoor growth in most of the United Kingdom throughout the late spring and summer months when overnight lows are above 8°C (46°F). Should you want to move the plant outside, limit its exposure to no more than one hour of direct sunshine every day to prevent sunscorch. Frequently check for bugs, particularly when bringing them back inside.
Distribute
Up to 0.7 meters in height and 1 meter in width, and it will take five to eight years to reach the maximum height.
Trimming
To promote healthier growth conditions, remove plant debris and any yellow or decaying leaves. Use clean shears or scissors while pruning to lower the risk of bacterial and fungal infections. Never cut through tissue that has become yellow because you might spread germs or other illnesses. Make sure your cuts are clean since excessively damaged wounds may shock a plant, impairing its development and health.
Transmission
Easy Seeds: Place the seeds in a dark place, ideally over a running radiator, and soak them in lukewarm water for about 24 hours. A potting mix labeled “Cactus & Succulent” is the ideal soil to use, although multipurpose compost with additional sand, grit, and perlite is also suitable. Avoid compacting the soil too much when you plant the seeds, spacing them about 2 cm (1 inch) deep in the potting mix. To avoid water-logged situations, keep the soil uniformly wet and let any extra water easily drain from the base of the pot. Successful germination requires a bright, indirect environment with bottom-heat temperatures over 18°C (64°F). To give a consistent humidity level and soil moisture that lasts longer, keep the pot in a clear bag. It may take up to three months for seeds to germinate, so wait to discard those that don’t work until beyond this point. After the seedlings sprout a second leaf, remove the bag and divide them into individual 5cm (2 inch) pots.
Easy Basal Offset Division: Your plant will generate many basal offsets that may be divided after they reach a height of more than 8 cm and have developed a strong enough root system. Water the soil 24 hours before to the main event, if as all possible, to lessen the chance of transplant shock, which occurs when the dry root systems are overfingered. Remove the plant from its container and put your fingers in the vicinity of the nodal junction; you may need to remove some dirt to improve access. Press the selected offset down until a snap is audible. After mentally noting the high danger of damage, separate the leaves and its root system from the mother plant. Transplant in the proper-sized container with a new batch of ‘Cactus & Succulent’ compost. Keep the soil uniformly wet and place it in a sunny, shaded spot away from any direct sunshine. Use the aforementioned care instructions to handle it as a regular specimen after four weeks!

When there is more than 20 centimeters (7.8 inches) of semi-wooded stem present in the early spring, stem cuttings (Easy) may be taken. This will need some time since the plant must mature to a certain point before its foundation is prepared. Cut off the top 20cm of the stem, just above the leaves, using clean secateurs. After the stem has grown three inches of roots, place the rooted section in a wet, well-draining potting mix. The lower half of the stem should be submerged in water to promote root development. While we suggest using a soil labeled ‘Cactus & Succulent,’ a general-purpose compost enhanced with sand and perlite can also function very well. The cutting’s base will get enough of oxygen as long as perlite is added to the mixture, which lowers the possibility of basal rot. To keep the plant (and its container) well-hydrated despite the quick loss of moisture in the stem, cover it with a transparent bag that has tiny holes in it. To hasten the pace of root growth, place the soil in an indirect, light area that receives constant moisture from the soil. After three weeks, take the bag off and adhere to the maintenance guidelines listed at the beginning of the article.
Blooms
Each year, a spike that may grow up to 70 cm in height holds the yellow blooms. The blossoming process takes many weeks, and each flower might endure up to several days. To extend this timeframe, make sure the plant is well hydrated by feeding it Cactus Feed every two weeks.
Repetting
Repot in spring every three years using potting mix labeled ‘Cactus & Succulent’ and the next larger container that has sufficient drainage. Because aloe vera is a “family plant,” the mother plant may happily grow alongside her puppies for many years, even if this means packing the container to capacity. Repotting should only be done when absolutely essential or if you are propagating the offsets (pups), as they like to stay potbound as this will minimize the danger of over-watering (& root rot).
To reduce the possibility of transplant shock if you were to repot your aloe, moisten the soil 24 hours before making any changes to the roots. Unless the rootball has been drastically diminished as a result of the pups spreading, use potting mix labeled “Cactus & Succulent” and the next larger pot size. A terracotta pot is what we suggest using since it will aid in moisture absorption and drainage.
If you would want a personalized guidance on repotting your houseplant, schedule a one-on-one video session with THE HOUSEPLANT DOCTORTM, the author of ukhouseplants.com. This will include suggesting the appropriate branded compost and pot size, and then there will be a live video chat during which you transplant the specimen to provide step-by-step instructions and address any other queries!
Diseases & Pests
Look out for mealybugs, spider mites, scale, thrips, whiteflies, vine weevils, and root mealybugs, which tend to hide in cubbyholes on the undersides of leaves (the latter two being in the soil). To find out more about common diseases that affect aloe vera, go here. Common diseases include powdery mildew, rust, root rot, leaf spot disease, botrytis, and southern blight.
Hazardousness
It is considered toxic to use this plant. Vomiting, nausea, and appetite loss may happen if plant pieces are consumed. Large-scale consumption has to be handled right away; seek medical attention for further details.